
Browse Guides
5 guides
3 guides
2 guides
13 guides
1 guide
9 guides
12 guides
2 guides
18 guides
1 guide
1 guide
1 guide
2 guides
1 guide
1 guide
1 guide
1 guide
1 guide
1 guide
1 guide
2 guides
2 guides
1 guide
Datasets
Create datasets, label images, organise them into groups, merge them, save versions, and start training.
Use the Datasets tab when you want to create and manage datasets for this data source.
Before you start
Open a data source, then select Datasets.
How to use it
- Open Datasets.
- Use the + button if you want to add a new dataset.
- Click a dataset row to open it, or ctrl-click (cmd-click on a Mac) to open it in a new tab.
- Work on the images inside the dataset.
- When the dataset is ready, create a version.
- Run training from that version.
- When training is done, check the Models tab.
Main flow
- Create a dataset.
- Use the dataset as your workspace for images, annotations, and labels.
- When the dataset is ready, create a zip version from it.
- Open the version menu and click Run training.
- When training finishes, the new model appears in the Models tab.
What you can see here
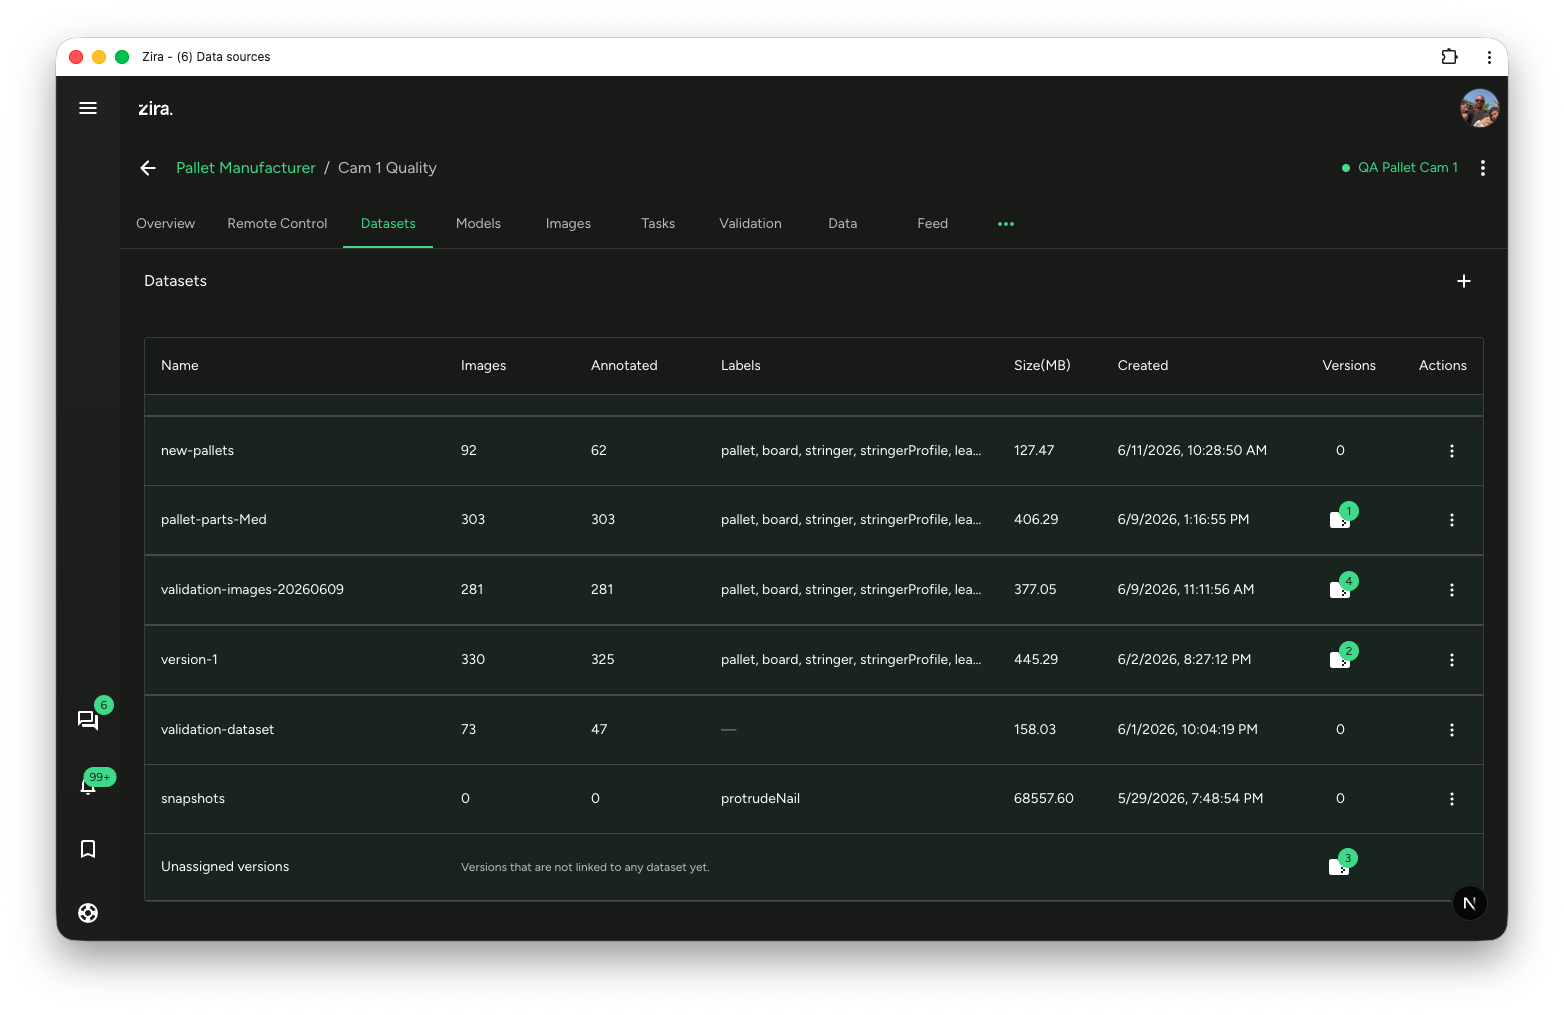
Each row shows:
- the dataset name
- number of images
- number of annotated images
- labels
- notes
- size
- created date
- number of versions
Notes
Use Notes on a dataset's ⋮ menu to record what is in it. The note shows in the Notes column, shortened to fit — hover to read it in full, or click it to edit.
Groups
Once a data source has more than a handful of datasets, the list gets hard to read. Groups sort them into named sections — for example one group per product line, or per camera.
To put a dataset in a group:
- Open the ⋮ menu on the dataset row.
- Choose Groups.
- Type a group name, or pick one already in use, and save.
A dataset can be in more than one group.
Two controls above the table work with them:
- The filter icon — narrows the list to the groups you pick. It shows a badge while a filter is on.
- The group icon beside it — splits the table into a section per group. This is how the tab opens. Click a section heading to open or close it, and click the icon again to go back to one plain list. Datasets that are not in any group are collected under Ungrouped.
To rename a group, click the pencil on its heading. Every dataset in it is updated. If you rename it to a group that already exists, the two are merged — the dialog tells you before you confirm.
The "archived" group
archived is a group the table treats specially. Anything in it drops to the bottom of the list and
starts closed, so datasets you have finished with stay out of the way without being deleted. Open
the section whenever you need them back.
Merging datasets
Merge datasets combines several datasets into one new version you can train on. Use it when you have been labelling in batches and want to train on everything at once. Your datasets themselves are never changed.
It asks four things:
- Which datasets — tick them in the list.
- Version name — what the result is called in the Versions list.
- Split — how much of each dataset goes to train, validation and test. Each dataset is split on its own, so all of them appear in all three.
- Classes to include — which classes the merged dataset keeps, and in what order. The order is the class number the model learns, so keep it the same between runs.
Use Merge & train if you want training to start by itself as soon as the merge finishes.
A merge can take several minutes on a large dataset. It keeps running if you close the page.
Merge analysis
Open Merge analysis if a merge looks wrong. It shows how many images and annotations each dataset contributes, how each class is spread across train / validation / test, any images that appear in more than one dataset, and a box-quality check for duplicate or very small boxes.
You do not need it for a normal merge.
Versions
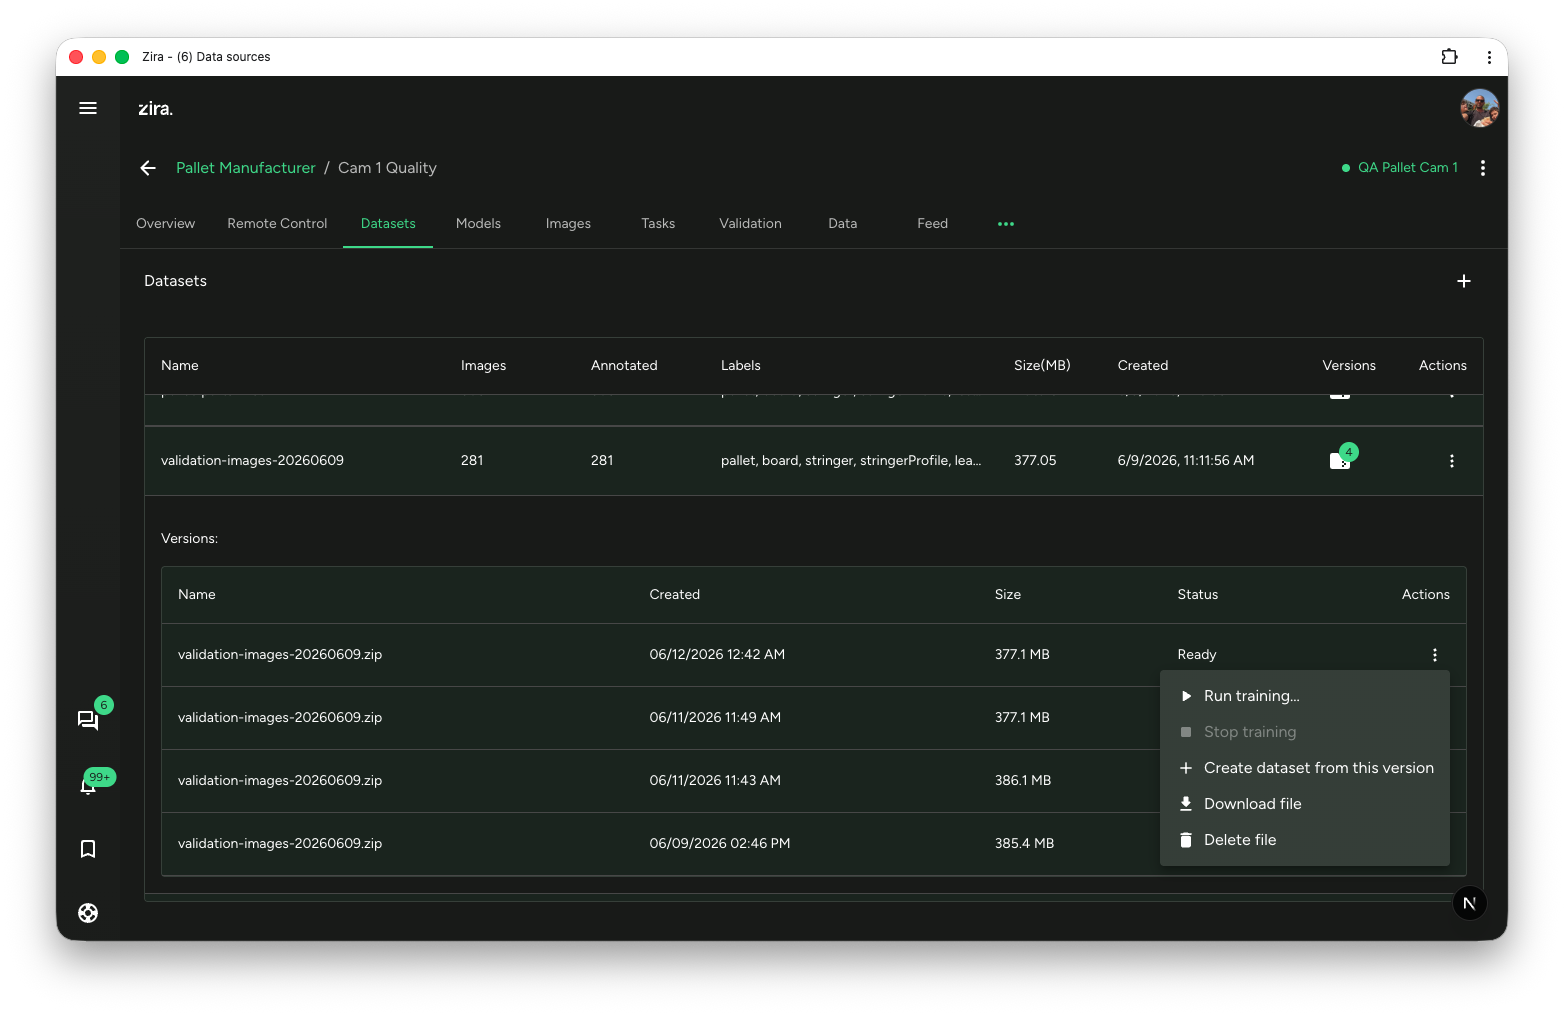
The Versions column shows how many versions belong to that dataset. Click it to open the list.
From a version menu, you can:
- run training
- download the file
- delete the file
- create a dataset from that version
You may also see Unassigned versions at the bottom. This means there are versions that are not linked to a dataset yet.
Background work
Merges, training runs and camera-file builds take minutes, and they keep going after you close the dialog that started them — or close Zira altogether. The history icon above the table is where you follow them.
- It appears once there is something to show, and carries a badge with the count.
- While something is still running, the icon turns into a spinner.
- Click it to see each piece of work, what it is doing, and whether it finished or failed.
If a run says no update has been received for a while, it may have stopped — start it again.