
Browse Guides
5 guides
3 guides
2 guides
13 guides
1 guide
9 guides
12 guides
2 guides
18 guides
1 guide
1 guide
1 guide
2 guides
1 guide
1 guide
1 guide
1 guide
1 guide
1 guide
1 guide
2 guides
2 guides
1 guide
Create a Data Source
Start a new data source from the create dialog, choose the right type, and continue into the editor or template flow that matches your setup.
Use the create flow when you want to add a new data source to a channel or system.
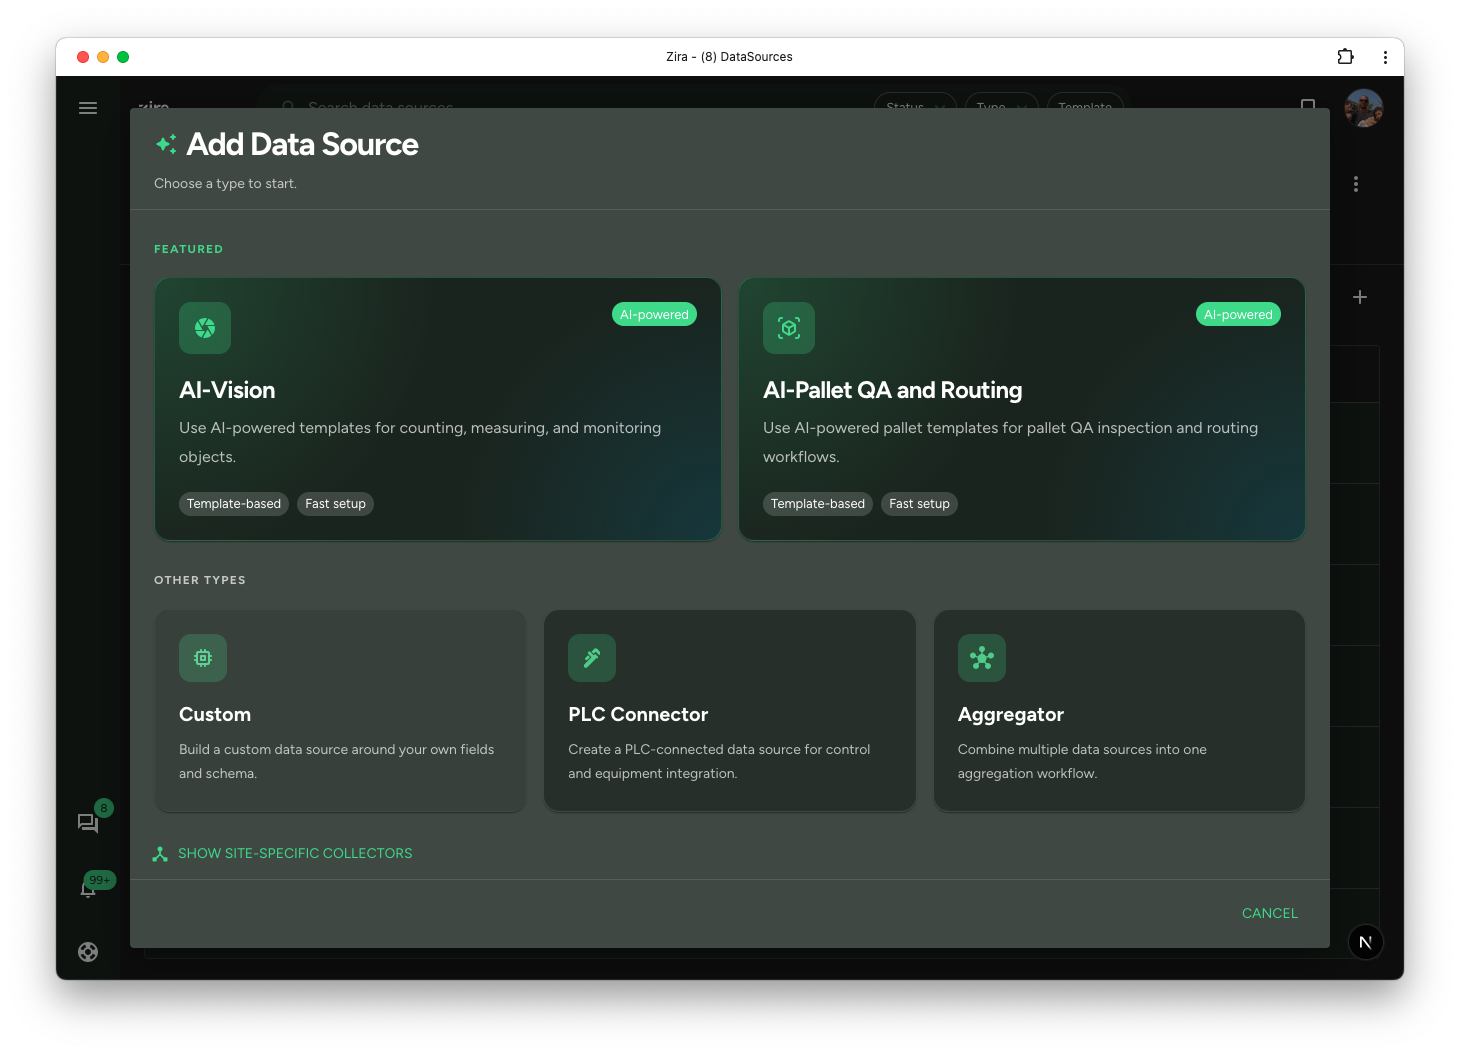
The create dialog highlights the main creation paths first, with AI-focused template options at the top and site-specific collector options available as a secondary section.
See the flow first
Start from the Data Sources tab and use the Add Data Source button in the top-right area.
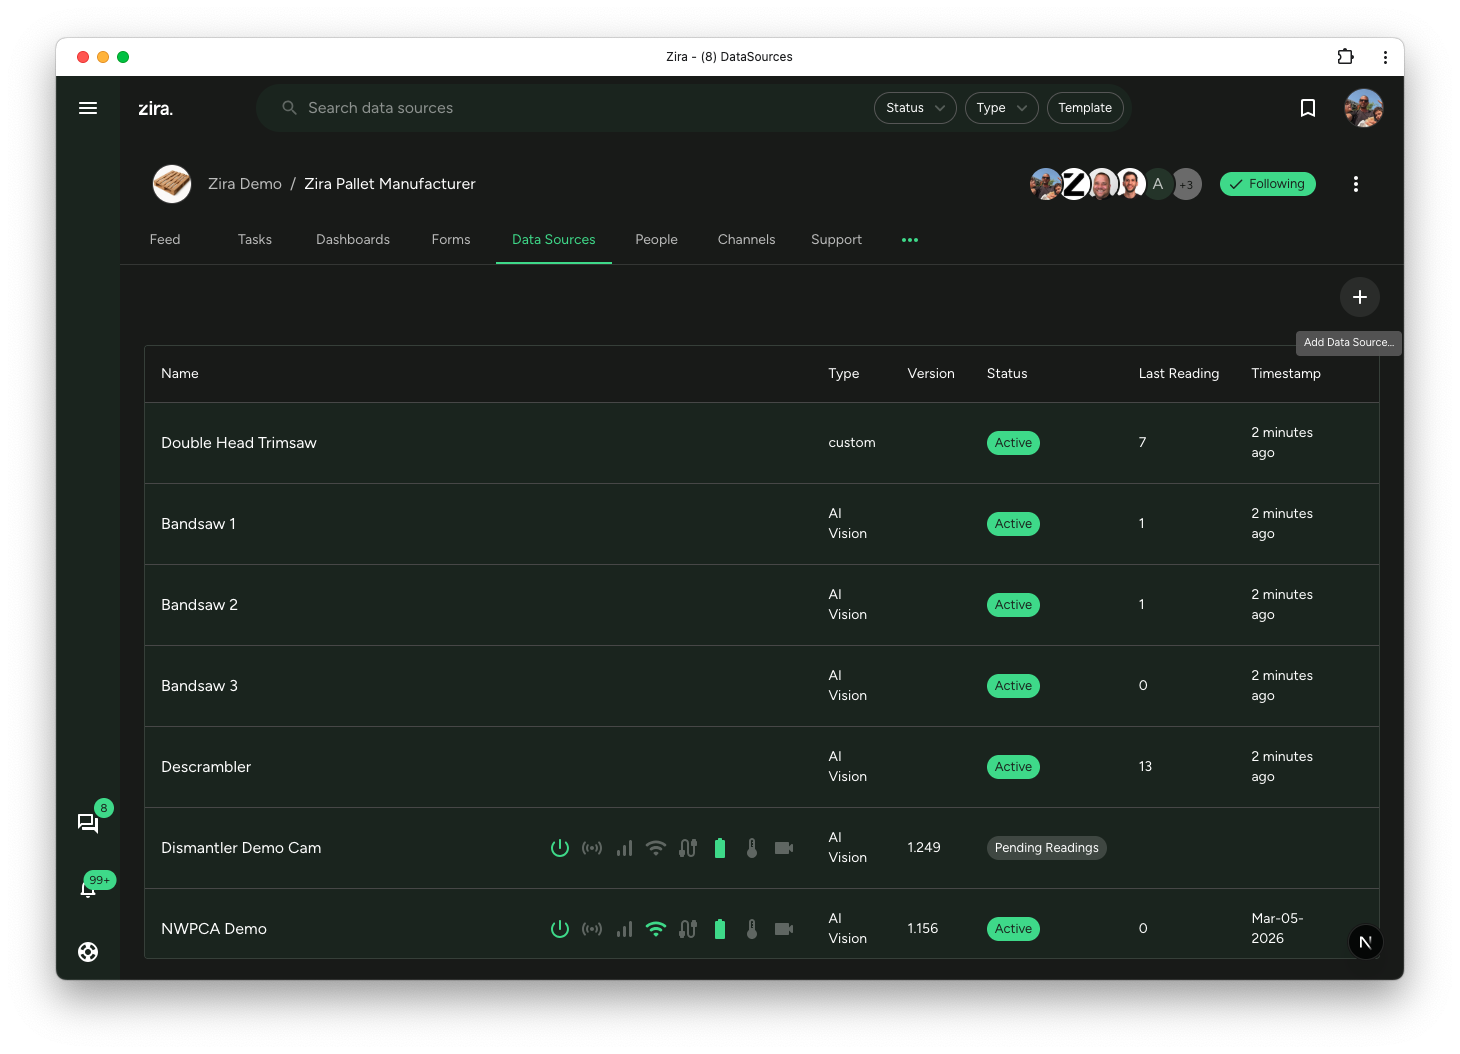
Start by opening the create dialog and choosing the type that matches your workflow.
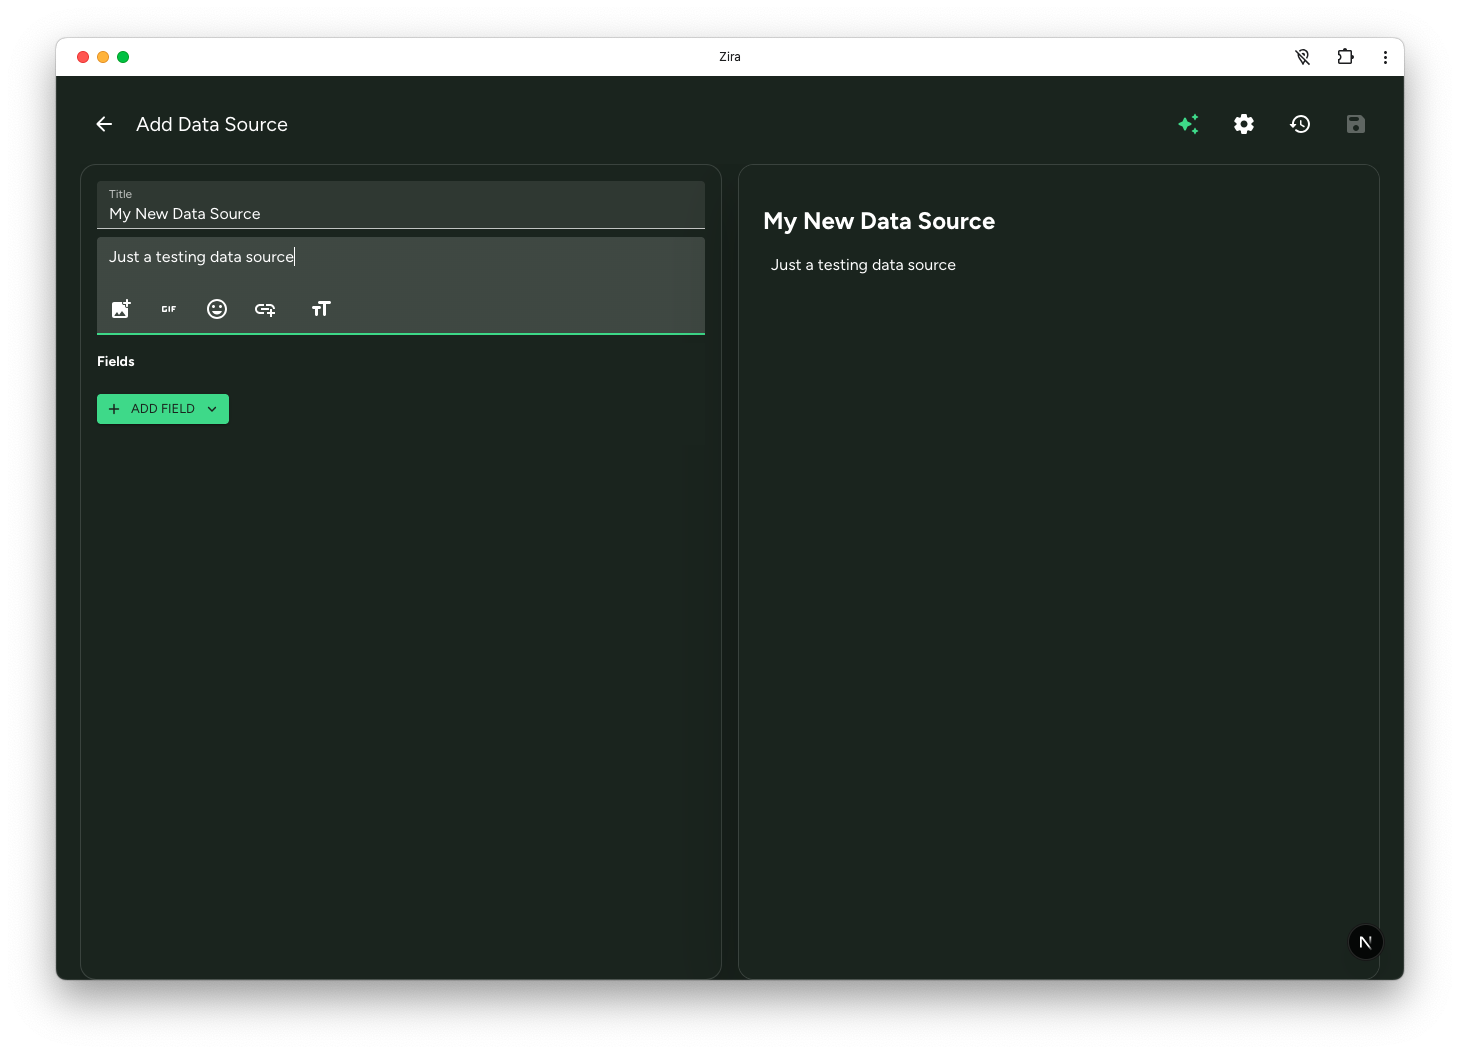
If you choose Custom, the shared editor opens so you can define the title, description, fields, and preview.
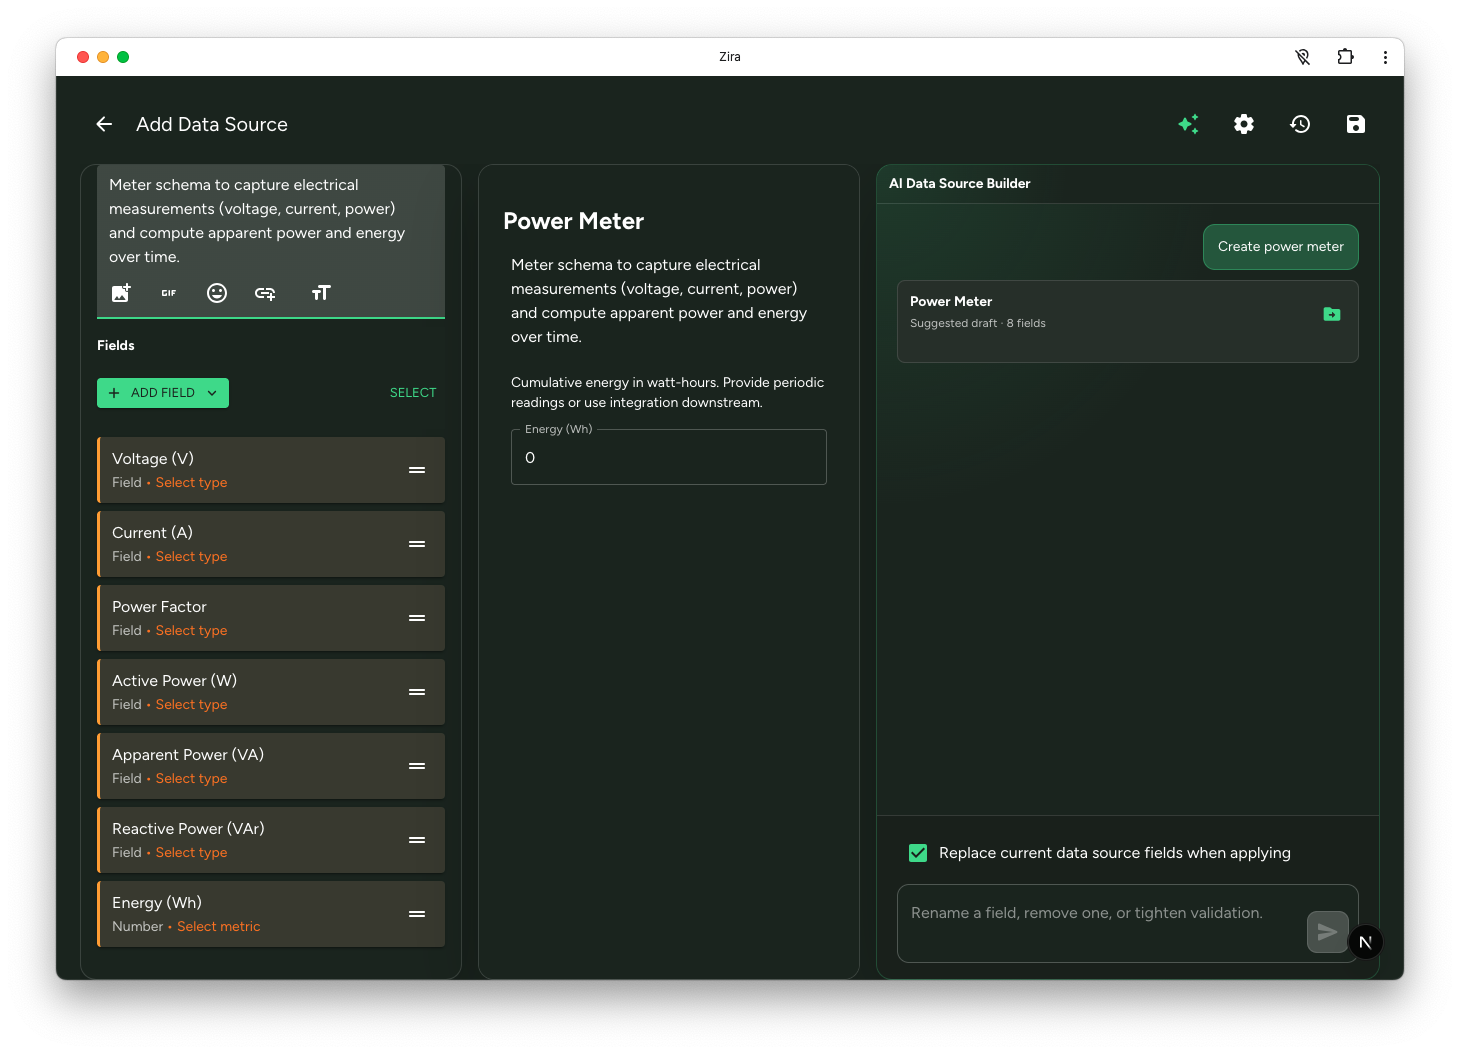
If you use AI Assist, Zira can draft the first version of the data source structure for you.
Open the create flow
- Open a channel.
- Click the Data Sources tab.
- Click Add Data Source.
Choose the right type
The create dialog focuses on these main paths:
- AI-Vision
- AI Pallet QA and Routing
- Custom
- PLC Connector
- Aggregator
Use the AI options when you want to start from a template-driven inspection workflow. Use the other types when you need a more manual or infrastructure-focused setup.
Create an AI data source
- Select AI-Vision or AI Pallet QA and Routing.
- Review the available templates in the same dialog.
- Select the template that matches the workflow you want.
- Enter a name.
- Click Create data source.
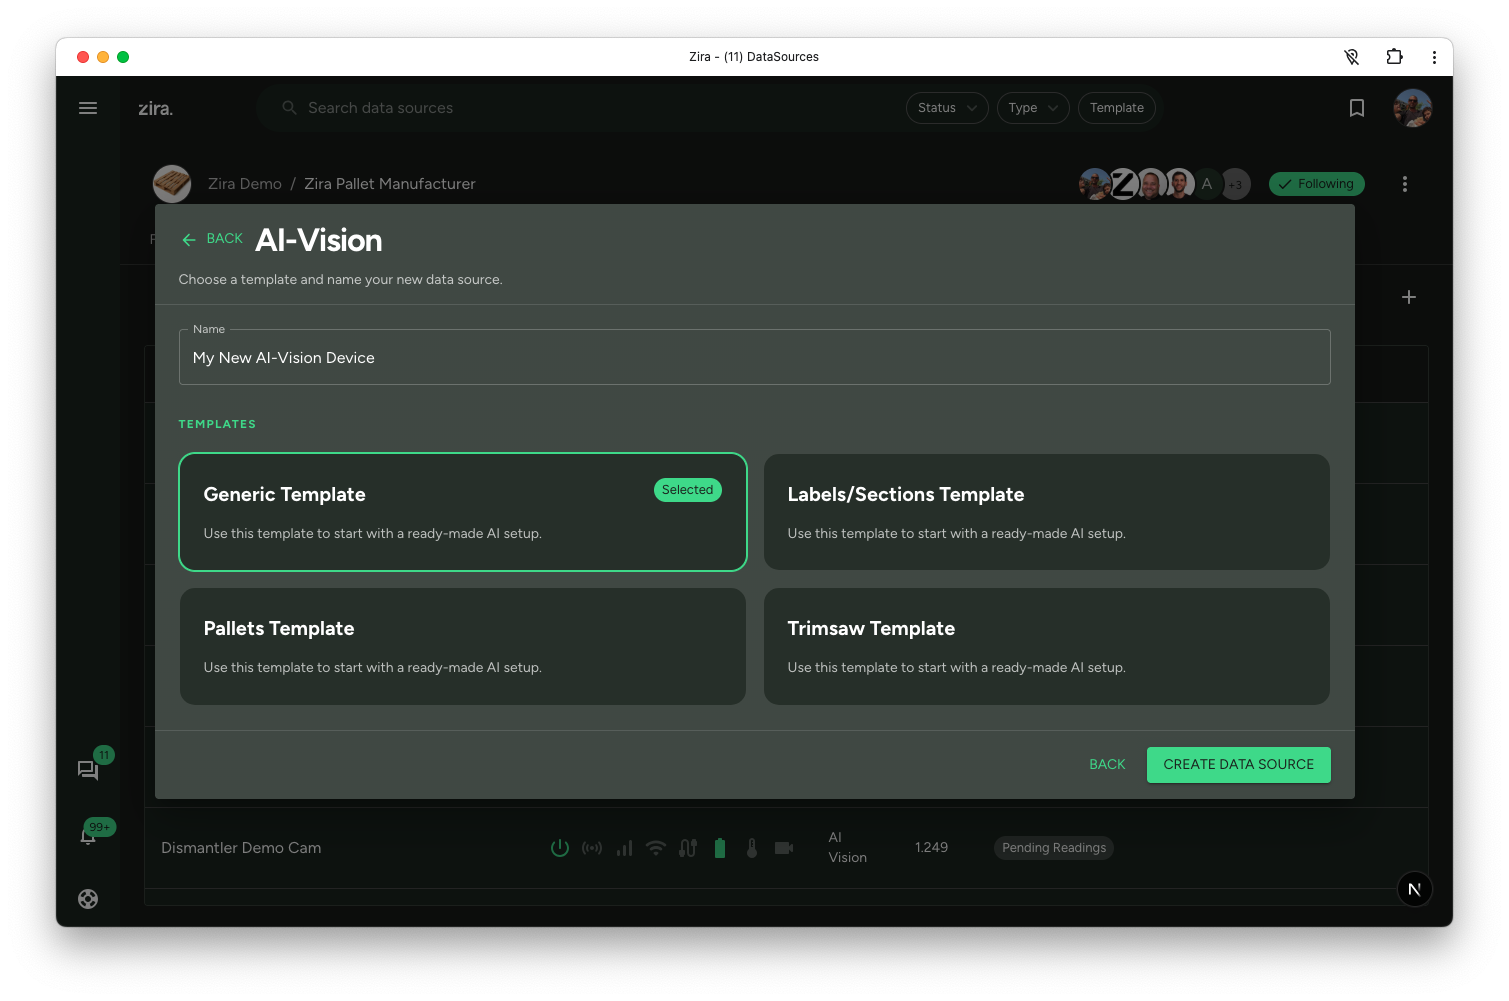
After creation, the new data source is attached and opened in the normal data-source workspace.
Pair a Zira AI-Vision device
After the AI-Vision data source is created, you can pair it with a Zira AI-Vision device.
- Open the data source row actions menu.
- Choose QR Pairing.
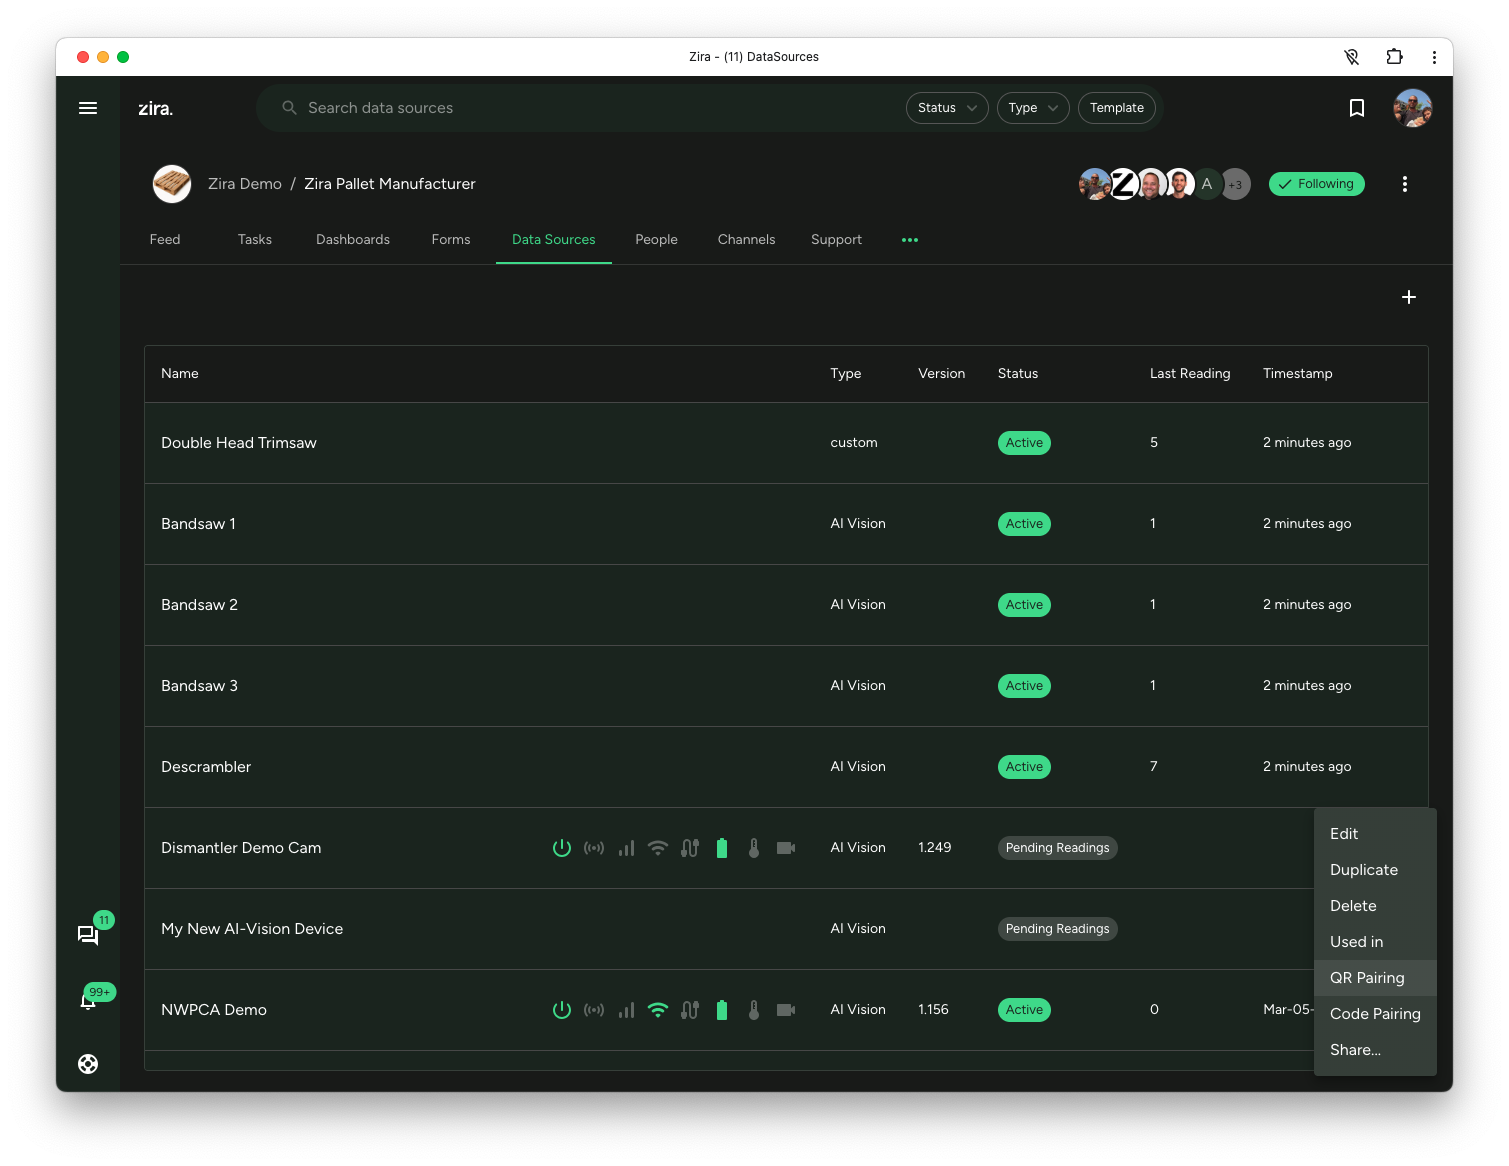
- A QR code opens on the screen.
- On the Zira AI-Vision device home screen, tap Pair to open the QR scanner.
- Scan the QR code shown in Zira to complete the pairing.
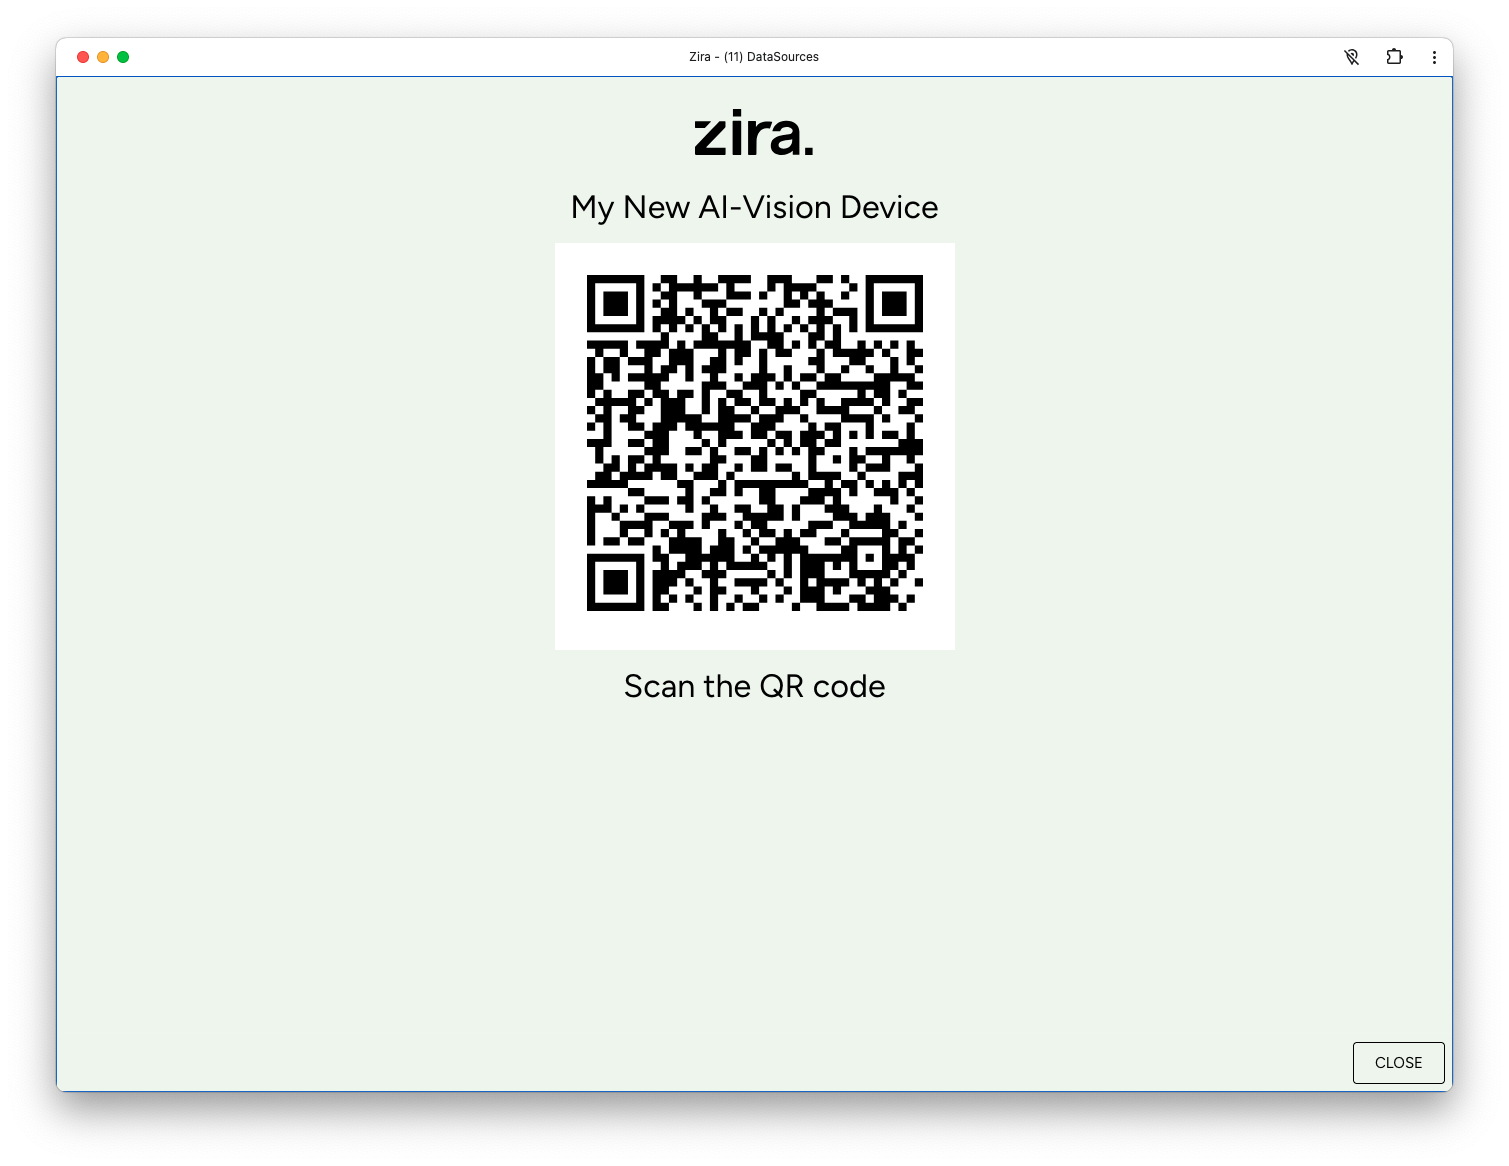
If you prefer not to scan the QR code, use the OTC option on the device and choose Code Pairing in Zira so you can type the code instead.
Create a custom data source
Choose Custom when you want to build the data source structure yourself.
This path opens the shared data-source editor, where you can:
- define the title and description
- add fields
- configure More settings
- preview the structure before saving
- use AI Assist to draft the structure for you
To learn the editor in more detail, continue with the create and edit guides below.
Create a PLC Connector
Choose PLC Connector when you need a connector-style data source for PLC-related integration work.
This path uses the same data-source editor, with PLC-specific setup fields such as the device IP address.
Create an Aggregator
Choose Aggregator when you want one data source to combine or summarize readings from other sources.
After creation, continue into the aggregation configuration step.
Use site-specific collectors
If your site supports collector-based setups, open the site-specific collectors section in the guided dialog.
Use this section when you want to create a collector-driven data source for a site that has its own supported integrations.
Read next
- AI-Vision Data Source - Create and pair an AI-Vision setup.
- AI-Pallet QA and Routing - Start from pallet QA and routing templates.
- Custom Data Source - Build the structure yourself in the shared editor.
- PLC Connector - Continue with PLC-related setup.
- Aggregator Data Source - Combine or summarize values from other sources.